It is important to know the parts of hydroponic garden. These components are essential in running a hydroponic system. Here we will cover a few. Also learn about the Nutrientfilm technique and Dutch bucket system. We'll also cover the advantages of each. Last, but not the least, we'll discuss how Hydroponics differs from traditional gardening.
Aeroponics uses nutrient-rich aerosol
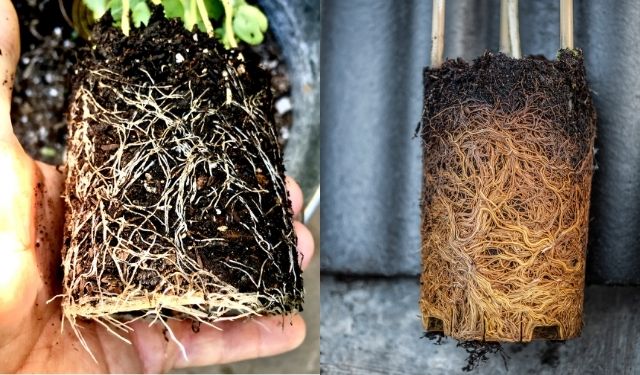
In aeroponic gardening, roots are suspended in nutrient-rich aerosol and are exposed to oxygen and air. They absorb water and nutrients from the air, which is sprayed onto them. A hydroton clay ball, or coco-coir soil substitute, supports the root system. Low-strength hydrogenperoxide is used to treat the water added to the reservoir. During the root growth, roots are placed onto an empty chamber.
Aeroponic hydroponics is efficient and can be easily transplanted. They also don't suffer from diseases and pests that can infest a traditional hydroponic system. Aeroponic systems are often enclosed in enclosures to prevent disease and pest outbreaks.
Aeroponics requires precision and attention. You must follow certain parameters to ensure that the water has the right amount of nutrients. The equipment can fail to function properly and cause damage. It is important to make sure that you only sprinkle the water once every two minutes or your roots could become dry. The misters should be cleaned frequently to prevent mineral deposits from clogging them.
A system that uses aeroponics to feed the roots with nutrients and oxygen is highly effective. It allows the plant grow faster, reduces the need to soil, and encourages cloning. Aeroponics systems take up less space than traditional hydroponics. They can also produce exceptional yields and growth rates. A variety of aeroponics system types are on offer, including low-pressure systems and vertical ones.
Dutch bucket system
Creating your own hydroponic garden is not as difficult as you might think. The Dutch bucket system is very simple to use. It only requires a few things, such as a central reservoir for the hydroponic medium. To prevent algae growth, the Dutch bucket should be made from dark material. You should also install proper bulkhead fittings and industry-standard 8mm barbed-nipples. In order to isolate plants when required, you will need shut-offs.
Measure the area in which you want to place your growing medium. Based on the number of containers you wish to place, you can cut a half-inch length of poly tubing. Next, connect the buckets and drainpipe to install emitter holes-equipped feeding tubes. After this, you're ready to start your own hydroponics system.
The main advantage of the Dutch bucket system for hydroponics is its low cost and ease of construction. It does not require complex hose-fittings, and has a central reservoir. Another benefit of this hydroponics system is that you only have to fill it once, saving you a lot of time and money. This method requires that you keep the reservoir and water source clean. A too acidic or alkaline solution will not benefit your plants, so you should maintain a healthy pH balance for your reservoir.
Hydroponic gardening can be done in a simple way with the Dutch bucket system. This is ideal for growing large plants within small spaces. The water-based solution flows from a dedicated reservoir and drips into the buckets. After a bucket is filled, the excess solution drains into the reservoir. This irrigation system may have several buckets. Additional solution can then be pumped out via a drainage line connected to each bucket.
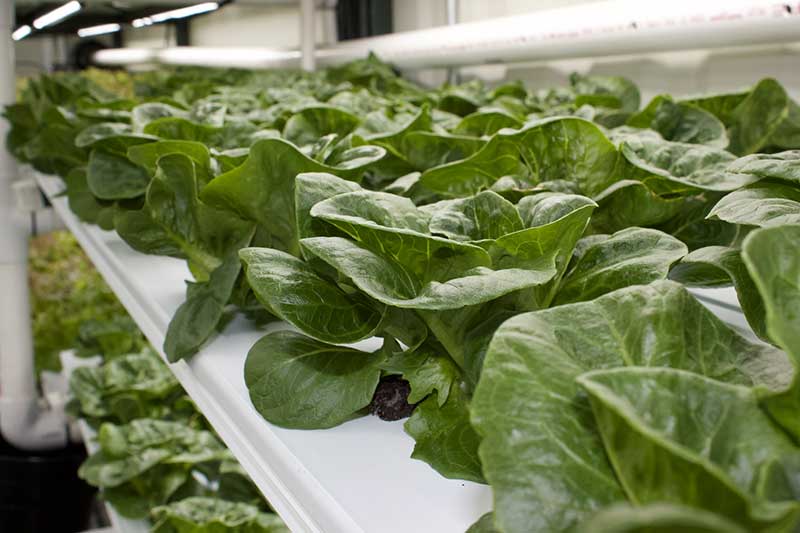
Nutrient-film technique
Hydroponic gardening's nutrient-film method involves covering the roots with a nutrient mixture. This method was once considered to be the best because it allowed for optimal water control. However, optimization strategies were difficult to create due to the absence of substrate. As a result, this technique is only appropriate for a small set of crops. These are some of its advantages and disadvantages.
Hydropnic gardening uses the Nutrient-film method. This involves applying a thin layer nutrient solution to roots. It keeps them dry and allows them to breathe. This method is best for fast-growing, lightweight plants that don’t need a lot of support. It is not recommended for top-heavy plants, as they will not grow as tall as they would if grown in soil.
The Nutrient-film technique in hydroponix is the simplest of the two techniques. A channel that is shallowly filled with nutrient mixture is used to grow the roots of the plants. The microclimate created by the flow of nutrients solution over roots creates healthy and strong plants. It is also easy to use, and suitable for advanced growers as well as beginners.
Nutrient-film technique is one of the main principles of hydroponics. It works by using a channel with sloped sides that pumps water through. The channel's water supplies water to plants while the solution dissolves nutrients. This setup is similar in concept to the Ebb and Flour method, but it uses water pumps.
NFT system
NFT systems use a reservoir in a grow tray with both a pump at top and drain pipe at bottom. A reservoir can be equipped with an external pump that connects to an air stone. This is very important because the plants will get the most nutrients and oxygen from the water they're growing in. There is no timer built into the NFT system. The pump runs continuously, which can be problematic if you're not able to turn it off during power outages or if your system fails.
When growing in an NFT system, air stones are not necessary as the water levels should stay low so that the roots can get oxygen. To prevent root rot, an air pump adds oxygen to the water. The slope of the nutrient reservoir must be such that water flows freely. The pump's time is controlled by a timer. To stop water from splashing, your grow channel should have a sloped water.
NFT works best for fast-growing light plants. Lettuce, for example, is very popular. Flandria, Ruby Sky, Ostinata and Cherokee are all popular varieties. People have had success growing perennial plants like strawberries in an NFT. If you wish to grow a more heavy crop, an independent trellis is the best option.
NFT is an excellent technique for beginners and experts alike. This method is high in nutrients, easy to manage, and long-lasting. You can also use the NFT system to grow herbs, strawberries, and other vegetables. A few benefits of the NFT system include:
Ebb & flow system
The ebb/flow system for hydroponics offers a flexible way to grow your plants. It supplies plants with oxygen, nutrients, and recycles your nutrient solution. It's also extremely economical as your nutrient mixture is continually recycled. While the ebb/flow system might seem daunting to beginners, once you get used to it, you'll find that you can grow vegetables, herbs, or fruits in no matter how much time.
For plants to be grown, you can use perlite or rockwool. Coco coir, however, is another option. Soil retains moisture and does not expose the roots to the same amount of oxygen as hydroponics. You can also use a fluorescent "grow stick" for less than $25, but it will not produce the lush growth you're after. A 200-watt bulb is the best choice.
When choosing an Ebb and Flow, you should consider the size of the tubing you use. For a 3/4-inch fitting you will need tubing at least one half inch thick. You can also use a suitable substrate to grow your medium. You can also use coco boss blocks or growcubes if you are growing rockwool. Perlite can be used in grow cubes and pots. A net pot can also contain hydroton rocks.
An Ebb and flow system is easy to set up. The system uses two containers: a plastic bucket that is placed in the flooding tray and a pump to transport the nutrient solution from reservoir to tray. Multiple buckets can be used depending on the needs of your plants for better growth. A timer can be used to adjust the level in each container automatically if there isn't enough room.
FAQ
What size space is required for a vegetable garden?
It is best to remember that 1/2 pound of seed will be required for every square foot. You will need 100 pounds of seed if your area is 10 feet by 10 foot (3 meters by 3 metres).
Do I have to purchase special equipment in order to grow vegetables on my own?
You're not wrong. All you need to do is use a shovel, trowels, watering containers, and maybe even a rake.
Which vegetables are best to grow together?
Growing tomatoes and peppers together is excellent because they both like similar temperatures and soil conditions. Both are great companions as tomatoes require heat to ripen, while peppers need cooler temperatures to achieve their best flavor. To grow them together, you can start seeds indoors around six weeks before planting. Once the weather warms up, transplant the tomato and pepper plants outdoors.
Can I grow vegetables inside?
Yes, you can grow vegetables inside in the winter. You will need to purchase a greenhouse or grow lights. Before you do this, make sure to verify the local laws.
What is a planting schedule?
A planting calendar is a list that lists plants that should be planted at specific times throughout the year. The goal of the planting calendar is to increase plant growth while minimizing stress. The last frost date should be used to sow early spring crops, such as spinach, lettuce, and beans. Cucumbers, squash, and spring beans are later crops. Fall crops include carrots, cabbage, broccoli, cauliflower, kale, and potatoes.
What should you do first when you start a garden?
First, prepare the soil before you start a garden. This involves adding organic matter, such as composted soil, grass clippings and leaves, straw or other material, to help provide nutrients for the plants. Next, plant seeds or seedlings into prepared holes. Water thoroughly.
Statistics
- According to a survey from the National Gardening Association, upward of 18 million novice gardeners have picked up a shovel since 2020. (wsj.com)
- Today, 80 percent of all corn grown in North America is from GMO seed that is planted and sprayed with Roundup. - parkseed.com
- As the price of fruit and vegetables is expected to rise by 8% after Brexit, the idea of growing your own is now better than ever. (countryliving.com)
- According to the National Gardening Association, the average family with a garden spends $70 on their crops—but they grow an estimated $600 worth of veggies! - blog.nationwide.com
External Links
How To
How to grow basil
Basil is one of your most versatile herbs. Basil is great for flavouring dishes, as well as adding flavor to soups and sauces, pasta, and desserts. These are some helpful tips to help you grow basil indoors.
-
Be careful about where you place it. Basil is an annual plant that will only survive one season if placed in the correct place. It likes full sun but can tolerate partial shade. It is best to grow it outdoors in an area with good air circulation.
-
Plant the seeds. Basil seeds should always be planted at least 2 weeks before the last frost date. Plant the seeds in small pots that are 1/2 inch deep. Cover the pots with clear plastic wrap and keep the pots in a warm area out of direct sunlight. Germination takes approximately ten days. Once they are germinated, transfer them to a protected area where the temperatures are at 70 degrees Fahrenheit.
-
When the seedlings reach maturity, you can transplant them. The plastic wrap should be removed and the seedlings transplanted into larger containers. Fill each container with potting mix and add some gravel or pebbles to help drain excess moisture. You can add more potting mix if necessary. Place the containers in a sunny window or in indirect light. The plants should be misted daily to prevent them from wilting.
-
After the dangers of frost have passed, mulch the plants. This will protect them from cold weather and reduce water loss.
-
Water the plants regularly. Basil needs regular watering to thrive. A rain gauge can be used to measure how much water plants need. A timer can be used to shut off the irrigation system when it is dry.
-
You should pick your basil at its peak. For bushier growth, pick leaves more often.
-
The leaves can then be dried on paper towels, screens, or other suitable surfaces. Place the leaves in glass jars, bags or in the refrigerator.