There are many things that you must remember when you are trying to grow your own microgreens. Remember, these plants require a pH range of 5.5 to 6.5. Before you spray the seeds, make sure your growing pad is saturated. Next, scatter the seeds on the growing pad. For small varieties, you can use 2 tablespoons dry seed or a quarter of a cup.
If you have the right knowledge, you can grow your own microgreens. Ted Chang shows you how to grow microgreens using punnets made from recycled strawberry liners. Growing microgreens doesn't necessarily require you to have a large garden or to be a good grower. Even your kitchen window sills could be used! Nevertheless, you should not expect them to grow quickly. You can always try other varieties if you're not sure.
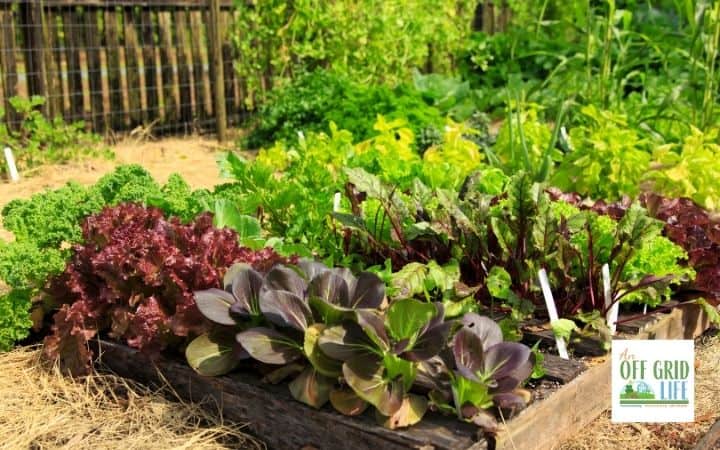
The nutrient solution must be rich enough to provide adequate nutrients to the plants. You must make sure that the nutrient mix contains all of the micronutrients required for microgreens growth. It is best to use trays specifically made for microgreens. You can also use a mat to grow microgreens if you don't feel comfortable handling containers. You don't need to use heavy soil for microgreens; you can simply cover the pots with plastic wrap to keep them moist.
If you follow these tips, growing your own microgreens is simple. Most microgreens can be harvested in between 10 and 14 days. However, some varieties may take longer. Regardless, it's a good idea to keep your growing tray as cool as possible. For the first few days, you can keep the compostable trays out of direct sunlight if you are using them. You can also store the microgreens in the refrigerator.
Growing your own microgreens is easy and safe. Microgreens have all the nutrients you need to maintain a healthy body. These can even be grown right on your windowill or roof. It is very simple. You can also hire a professional to assist you if you aren't confident in the growth of your greens. You'll be rewarded by delicious and nutritious microgreens that will make a great addition for your diet.
Microgreens are not only nutritious but also very portable. These plants are perfect for packing into lunches because of their size and shape. Microgreens can be a quick and simple way to get your daily dose of fresh vegetables. Make sure to select nutritious seeds and follow all instructions. And don't forget to enjoy your new crop! If you're not growing microgreens, consider starting a business with these healthy crops. You may find this a profitable startup business!
Whether you're retired or not, a microgreens growing business can keep you busy and help feed the world. Not only will your microgreens grow in a few days, but you'll make a few bucks along the way. Some of the more popular microgreen crops are arugula, basil, celery, cabbage, endive, radish, and mustard. If you're retired, microgreens are a great way to make money, and you can even grow your own heirlooms.
FAQ
How many hours does a plant need to get light?
It depends on the type of plant. Some plants need 12 hours of direct sun per day. Some plants prefer 8 hours of direct sunlight. Most vegetables require 10 hours direct sunlight in a 24-hour period.
When to plant flowers
Planting flowers during springtime is best when temperatures are warm and the soil feels moist. If you live in colder climates, it is best to plant flowers after the first frost. The ideal temperature to grow plants indoors is 60 degrees Fahrenheit.
What equipment do I need to grow vegetables?
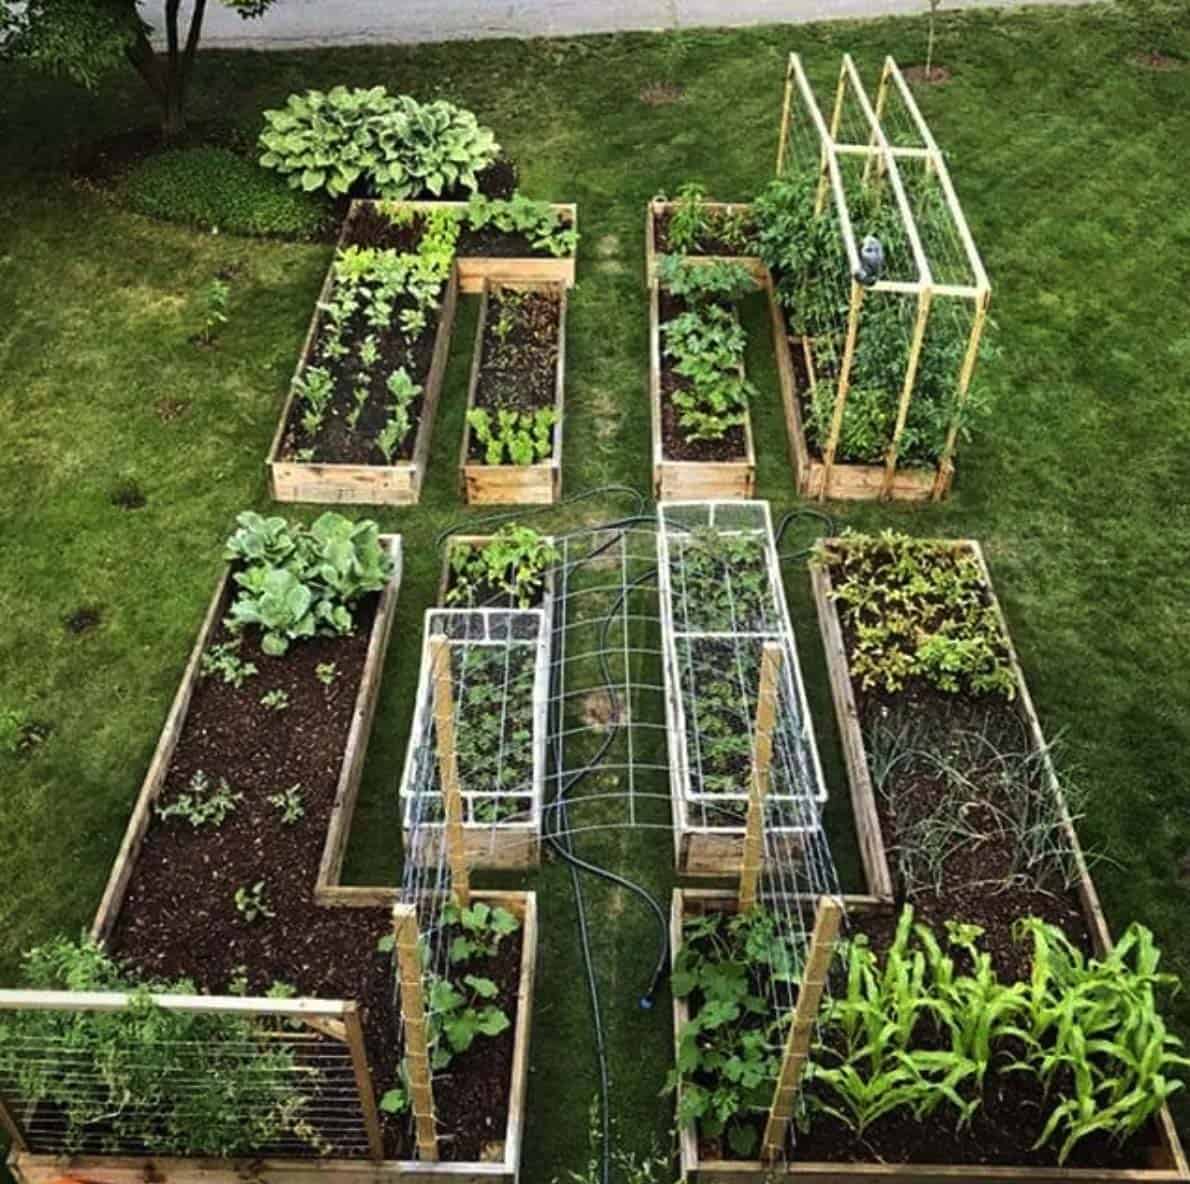
It's not true. All you need is a shovel, trowel, watering can, and maybe a rake.
Statistics
- 80% of residents spent a lifetime as large-scale farmers (or working on farms) using many chemicals believed to be cancerous today. (acountrygirlslife.com)
- According to the National Gardening Association, the average family with a garden spends $70 on their crops—but they grow an estimated $600 worth of veggies! - blog.nationwide.com
- According to a survey from the National Gardening Association, upward of 18 million novice gardeners have picked up a shovel since 2020. (wsj.com)
- As the price of fruit and vegetables is expected to rise by 8% after Brexit, the idea of growing your own is now better than ever. (countryliving.com)
External Links
How To
Basil growing tips
Basil is one the most versatile herbs that you can use in your home. Basil is great for flavouring dishes, as well as adding flavor to soups and sauces, pasta, and desserts. These are some great tips to grow basil indoors.
-
Choose your location carefully. Basil is an annual and will not live more than one season if it isn't in the right spot. It likes full sun but can tolerate partial shade. If you want to grow it outside choose an area that is well-ventilated.
-
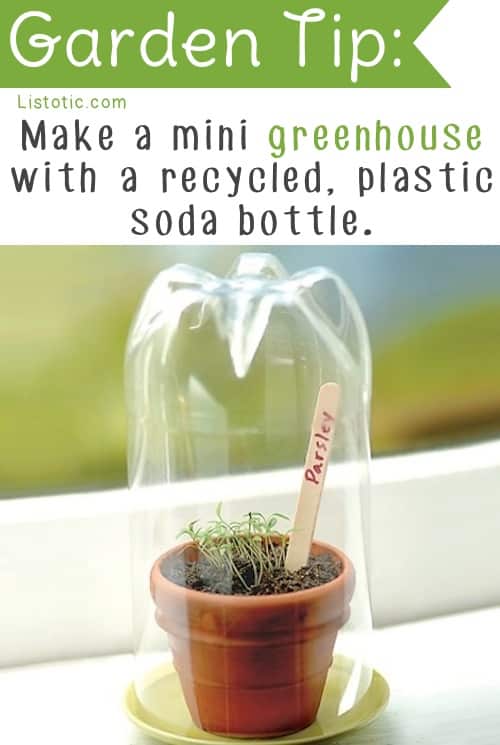
Plant the seeds. Basil seeds should be planted two weeks before the last frost date. Sow seeds 1/2 inch deep in small pots filled with potting mix. Clear plastic wrap should be used to cover the pots. Germination usually takes about ten days. Once germinated, move the pots into a shaded area where temperatures stay around 70 degrees Fahrenheit.
-
Once they are large enough to handle, transfer the seedlings. Take off the plastic wrap and transfer the seedlings to larger containers. Each container should be filled with potting mix. To help remove excess moisture, add gravel or pebbles. As necessary, you can add more potting material. Place the containers in a sunny window or in indirect light. The plants should be misted daily to prevent them from wilting.
-
Apply a thick layer mulch to the top of your plants after the danger of frost has passed. This will prevent them from frost damage and help to reduce water loss.
-
Regularly water the plants. Basil needs to be hydrated regularly to ensure its survival. A rain gauge can be used to measure how much water plants need. Also, use a timer to turn off the irrigation system during dry spells automatically.
-
Pick your basil when it reaches its prime. For bushier growth, pick leaves more often.
-
The leaves can be dried on paper towels or screens. Keep the dried leaves in glass containers or bags in a refrigerator.